Sprite Tutorial (Part 1)
Page 1 of 1

Sprite Tutorial (Part 1)
![]() SeanRaider87 Fri Nov 19, 2010 10:18 pm
SeanRaider87 Fri Nov 19, 2010 10:18 pm
Sprite Appearance Editing Tutorial
Part 2: Coming Soon
This is the tutorial for teaching you how to edit a character into another character, to me, this is one of the easiest parts of spriting, so once you've read this, hopefully, you'll know how to make your own character.
I will be using JUS style as it is my favorite style, and very popular.
I will be using Adobe Photoshop CS3 in the tutorial, it's a lot like paint, which I'm sure most of you have, so it won't be too confusing.
Step 1: Finding The Sprite To Edit
First, go to Sprite Database, and pick the character that looks the most like the one you're trying to edit it into. (I'm using JUS sprites, you can find those here.)

Download the character's sprite sheet to the desktop.
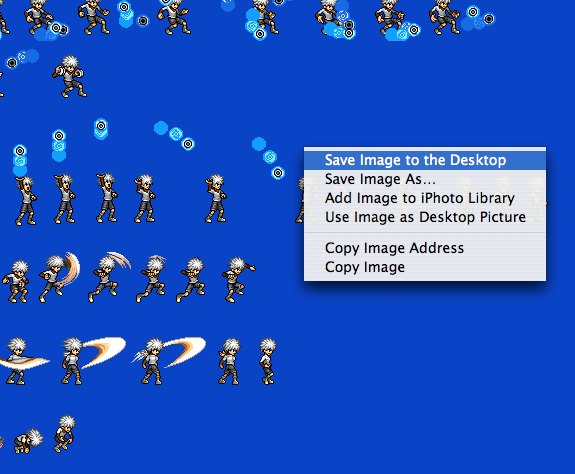
Step 2: Getting The Sprite Open
Open the sprite sheet in whatever art program you have.

Draw a box around the one pose you want your sprite to be based off of.

Go to edit on the top of the screen and press copy.

Open another file.

Paste the sprite into it. Go ahead and close the sprite sheet, you won't need it for a while.

Step 3: Getting The Head
To me, making a head is the hardest part in this tutorial by far, so I cheat a little. Start by erasing the head of the sprite you're editing.


Then, go back to Sprite Database and pick a character who has a head similar to what you want your character's head to be.

Download the character's sprite sheet to the desktop.

Open the sprite sheet in whatever art program you have.

Draw a box around the one pose that has the head in a way you like.

Go to edit on the top of the screen and press copy.

Go to the file with your other sprite in it paste the sprite into it.


Go ahead and close the sprite sheet, you won't need it again. Erase everything but the head on the second sprite.


Move it on top of the neck of the sprite without the head.

Merge the two sprites into one.
Step 4: Recolouring
Find a dark colour for your character's shirt, colour all the darkest pixels with it.

Take a slightly lighter colour for the second darkest colour and so on.


Do this with the rest of the stuff, it's very simple, you keep the great shading of JUS style and you get the colours you want.

Step 5: Slight Editing
You still have the head of the other character, it's time to fix that. Make his hair into a style you want, it's fairly easy, just get rid of the current hair and make a new hairdo.


The harder part is shading it. Just get 2 or 3 colours and put it on, this picture will show you how.

Change whatever facial features you want, it's simple, just use the eraser and pencil tool to change stuff.

Now that the head is done, you can add little extra things, like designs on the shirt, changing the shape of their shoes, changing pants into shorts or vice versa, you can do whatever you want.

Step 6: Finishing Up
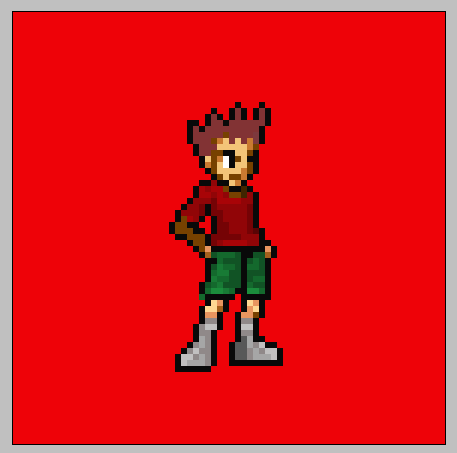
You're practically finished, just fix up stray pixels and stuff like that, any mistakes you see, just change them quickly.

This is the finished product:

I hope I taught you something, go ahead and post your attempts at sprite editing, I want to see what you come up with.
Part 2: Coming Soon
This is the tutorial for teaching you how to edit a character into another character, to me, this is one of the easiest parts of spriting, so once you've read this, hopefully, you'll know how to make your own character.
I will be using JUS style as it is my favorite style, and very popular.
I will be using Adobe Photoshop CS3 in the tutorial, it's a lot like paint, which I'm sure most of you have, so it won't be too confusing.
Step 1: Finding The Sprite To Edit
First, go to Sprite Database, and pick the character that looks the most like the one you're trying to edit it into. (I'm using JUS sprites, you can find those here.)
Download the character's sprite sheet to the desktop.
Step 2: Getting The Sprite Open
Open the sprite sheet in whatever art program you have.
Draw a box around the one pose you want your sprite to be based off of.
Go to edit on the top of the screen and press copy.
Open another file.
Paste the sprite into it. Go ahead and close the sprite sheet, you won't need it for a while.
Step 3: Getting The Head
To me, making a head is the hardest part in this tutorial by far, so I cheat a little. Start by erasing the head of the sprite you're editing.
Then, go back to Sprite Database and pick a character who has a head similar to what you want your character's head to be.
Download the character's sprite sheet to the desktop.
Open the sprite sheet in whatever art program you have.
Draw a box around the one pose that has the head in a way you like.
Go to edit on the top of the screen and press copy.
Go to the file with your other sprite in it paste the sprite into it.
Go ahead and close the sprite sheet, you won't need it again. Erase everything but the head on the second sprite.
Move it on top of the neck of the sprite without the head.
Merge the two sprites into one.
Step 4: Recolouring
Find a dark colour for your character's shirt, colour all the darkest pixels with it.
Take a slightly lighter colour for the second darkest colour and so on.
Do this with the rest of the stuff, it's very simple, you keep the great shading of JUS style and you get the colours you want.
Step 5: Slight Editing
You still have the head of the other character, it's time to fix that. Make his hair into a style you want, it's fairly easy, just get rid of the current hair and make a new hairdo.
The harder part is shading it. Just get 2 or 3 colours and put it on, this picture will show you how.
Change whatever facial features you want, it's simple, just use the eraser and pencil tool to change stuff.
Now that the head is done, you can add little extra things, like designs on the shirt, changing the shape of their shoes, changing pants into shorts or vice versa, you can do whatever you want.
Step 6: Finishing Up
You're practically finished, just fix up stray pixels and stuff like that, any mistakes you see, just change them quickly.
This is the finished product:
I hope I taught you something, go ahead and post your attempts at sprite editing, I want to see what you come up with.
SeanRaider87- Posts : 13
Join date : 2010-11-19
Page 1 of 1
Permissions in this forum:
You cannot reply to topics in this forum